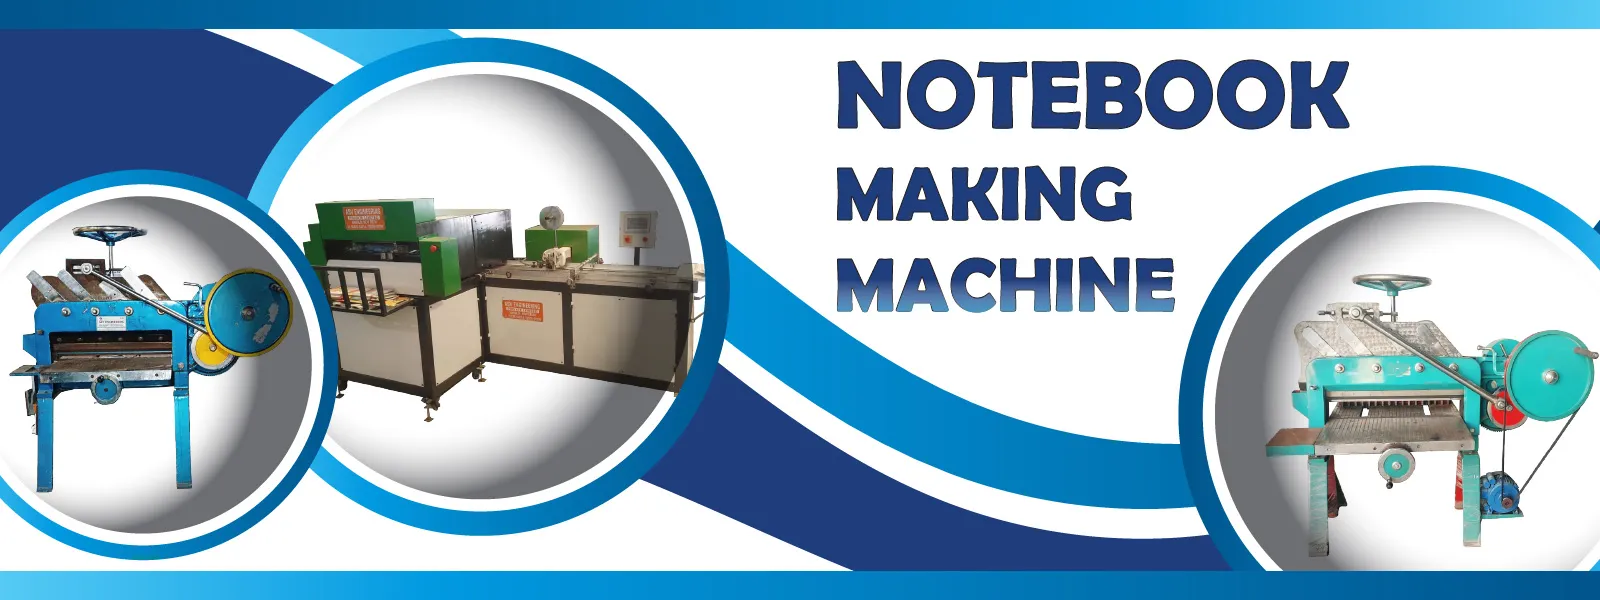
Understanding the complete notebook manufacturing process is essential for anyone entering the stationery production industry. From raw paper rolls to the finished notebook that reaches a student's desk, each step requires precision, quality control, and the right equipment. This detailed guide walks you through every stage of the notebook manufacturing process, explaining the technical requirements, quality standards, and best practices followed by successful manufacturers across India.
This is one of the best small business ideas with notebook making machine price starting from Rs 45,000* for entrepreneurs wanting to enter the manufacturing sector.
Step 1 - Raw Material Selection and Procurement
The notebook manufacturing process begins with selecting the right raw materials. The quality of the final product is directly determined by the quality of the paper, cover material, binding supplies, and printing ink used in production. The primary raw materials include paper rolls or sheets, cover paper or printed covers, binding wire or thread, and printing ink for ruling lines.
Paper Selection
Paper is the most important raw material in notebook manufacturing, accounting for approximately 60-65% of the total production cost. Indian notebook manufacturers commonly use uncoated wood-free paper available in GSM ranges from 55 to 75. For standard exercise notebooks, 55 GSM or 60 GSM paper is the industry standard as it offers an optimal balance between cost, weight, and writing quality. Premium notebooks and journals use 70 GSM or 80 GSM paper which provides a thicker, smoother writing surface.
Paper is typically procured in large rolls from paper mills or in pre-cut sheets from paper merchants. Purchasing directly from mills offers the best pricing but requires larger storage space and higher minimum order quantities. The paper should be stored in a dry, climate-controlled environment to prevent moisture absorption, which can cause feeding problems in cutting and printing machines. Quality checks at this stage include verifying GSM accuracy, checking for uniform thickness, and ensuring there are no holes, tears, or foreign material in the paper.
Cover Material
Book covers for notebooks are made from heavier paper stock, typically ranging from 150 GSM to 250 GSM. The cover can be plain colored paper, printed paper with custom designs and branding, or laminated paper for enhanced durability and appearance. For basic school notebooks, single-color cover paper in the 170-200 GSM range is most common. Premium notebooks often feature printed covers with UV coating, lamination, or embossing for a more attractive and professional finish.
Binding Materials
The choice of binding material depends on the type of notebook being manufactured. Wire staples (also called wire stitching pins) are the most common binding material for standard exercise notebooks, available in various sizes to accommodate different page counts. Cotton or polyester thread is used for thread-stitched notebooks which offer a more premium appearance. Spiral coils in plastic or metal are used for spiral-bound notebooks. Binding wire in double-loop format is used for Wire-O bound notebooks. The binding material cost is relatively small per unit but must be selected carefully to ensure notebook durability.
Step 2 - Paper Cutting to Size
Once the raw materials are procured and quality-checked, the first manufacturing step is cutting the paper to the required dimensions. Paper cutting is a critical process that determines the final size and shape of the notebook. Using a notebook cutting machine, large paper rolls or sheets are cut into precise sizes based on the notebook specifications.
Standard Notebook Sizes in India
The most common notebook sizes manufactured in India follow standardized dimensions that are widely accepted in the education and stationery market:
- Full Scap (300mm x 200mm): The most popular size for school notebooks, widely used across India for primary and secondary education.
- Long Book (275mm x 200mm): Slightly shorter than full scap, commonly used for examination notebooks and general-purpose writing.
- Half Scap (250mm x 160mm): A compact size popular among primary school students and for pocket notebooks.
- Executive Size (230mm x 150mm): Used for office notebooks, meeting pads, and professional stationery.
- A5 Size (210mm x 148mm): An international standard size used for premium notebooks, journals, and planners.
Cutting Process Details
The cutting process involves several sub-steps to ensure precision and consistency. First, the paper is aligned and stacked to the maximum height that the cutting machine can handle. The cutting dimensions are set on the machine using either manual measurements or programmable digital controls. The blade must be sharp and properly aligned to ensure clean cuts without tearing or ragged edges. After cutting, the paper stacks are inspected for dimensional accuracy and any defective sheets are removed before proceeding to the next step.
Paper trimmings and offcuts generated during the cutting process should not be wasted. These smaller pieces can be used for making notepads, sticky notes, or smaller-sized notebooks, adding additional revenue streams from what would otherwise be waste material. Efficient utilization of paper trimmings can reduce overall material costs by 5-10%.
Step 3 - Line Printing (Ruling)
After cutting the paper to size, the next step is printing ruling lines on the inner pages. This process, known as ruling or line printing, creates the horizontal lines that guide handwriting on notebook pages. Line printing is performed using specialized ruling machines that can print single lines, double lines, four-line ruling for handwriting practice, or grid patterns for mathematics notebooks.
Types of Ruling Patterns
- Single Line Ruling: Simple horizontal lines spaced at standard intervals, used for general writing notebooks. This is the most common ruling type for school notebooks in India.
- Four Line Ruling: Four parallel lines with specific spacing used for English handwriting practice notebooks. These are popular among primary school students learning cursive writing.
- Graph/Grid Ruling: Intersecting horizontal and vertical lines creating a grid pattern, used for mathematics and science notebooks. Grid sizes vary from 3mm to 8mm depending on the target age group.
- Margin Line: A vertical red line printed on the left side of the page to indicate the margin area. Most Indian school notebooks include a margin line in addition to horizontal ruling.
Printing Quality Standards
The ruling lines must be printed with consistent spacing, straight alignment, and uniform ink density across all pages. Lines that are crooked, unevenly spaced, or poorly printed reduce the notebook's quality and appeal. The ink used for ruling should be water-resistant to prevent smudging during use and should not bleed through the paper. Quality control at this stage involves checking line straightness, spacing consistency, ink density, and ensuring no pages are missed or printed upside down.
Step 4 - Cover Design and Printing
While the inner pages are being prepared, the notebook covers are designed and printed simultaneously. Cover printing can range from simple single-color prints for basic notebooks to full-color designs with brand logos, subject names, and decorative elements for premium products. Modern cover printing uses offset printing, digital printing, or screen printing depending on the order quantity and design complexity.
Cover Printing Methods
Offset printing is the most cost-effective method for large print runs of 5000 or more covers. It offers high-quality printing with consistent color reproduction and sharp details. Digital printing is preferred for smaller quantities and allows for easy customization of individual covers with different subjects, names, or designs. Screen printing is used for specialty covers with metallic colors, special textures, or unusual materials. After printing, covers may receive additional treatments such as lamination (matte or glossy), UV coating, or varnishing for enhanced appearance and durability.
Step 5 - Page Counting and Collation
Once the inner pages are cut and ruled, they must be counted and collated into complete sets for each notebook. This step ensures that each notebook contains the correct number of pages as specified in the product design. Manual page counting is slow and error-prone, so most manufacturers use automated page counting machines that can accurately count hundreds of page sets per hour.
Page counting machines use sensors to detect and count individual sheets, ensuring that each set has exactly the required number of pages. The machine can also detect missing pages, double feeds, or damaged sheets, removing defective sets from the production line. This automated quality control step is essential for maintaining consistent notebook quality and preventing customer complaints about incorrect page counts.
Step 6 - Folding Cover and Pages
After collation, the cover and inner page set are folded together to create the notebook's spine fold. The folding process must produce a clean, sharp crease along the spine edge without cracking the cover or misaligning the pages. A notebook cutting and folding machine handles this process efficiently, ensuring consistent fold quality across all notebooks in a production batch.
The fold position must be precisely centered to ensure that the front and back covers are symmetrical and that the pages are evenly distributed on both sides of the spine. Incorrect folding results in uneven pages, crooked covers, and poor overall appearance. Quality checks during folding include verifying fold straightness, checking for cover cracking, and ensuring proper alignment of all components.
Step 7 - Stitching or Binding
Stitching is the process of securing the folded pages and cover together through the spine. This is the step that transforms loose sheets of paper into a bound notebook. The two primary binding methods are wire stitching and thread stitching, each with its own equipment and technique requirements.
Wire Stitching Process
Wire stitching uses a notebook making machine with a built-in stitching head to drive metal staples through the spine of the notebook. The staples penetrate through the cover and all inner pages, then bend flat against the inside back cover to secure the binding. The number and position of staples depend on the notebook size and page count - standard notebooks typically receive two or three staples evenly spaced along the spine. Stitching speed ranges from 200-400 notebooks per hour for semi-automatic machines to 600-1000 per hour for fully automatic models.
Thread Stitching Process
Thread stitching uses cotton or polyester thread to bind the notebook through the spine, creating a more durable and aesthetically pleasing binding. The thread is typically sewn in a saddle-stitch pattern, passing through the fold line at regular intervals. Thread-stitched notebooks are more resistant to page detachment compared to wire-stitched alternatives and are preferred for premium products, export orders, and notebooks intended for heavy daily use.
Step 8 - Edge Trimming
After stitching, the notebook edges must be trimmed to create clean, uniform edges on the top, bottom, and front side (the three sides opposite the spine). Edge trimming is performed using a precision cutting machine that trims all three sides in a single operation or sequentially. This step gives the notebook its final, professional appearance by removing any uneven edges, protruding pages, or cover overhang.
The trimming process must be performed with extreme precision to ensure that all pages are cut to exactly the same size without cutting into the binding or leaving uneven margins. The trimming blade must be sharp and properly aligned to produce clean cuts without tearing or fraying the paper edges. After trimming, the notebook should have smooth, uniform edges that are pleasant to touch and visually appealing.
Step 9 - Quality Inspection and Grading
Quality inspection is a critical step that ensures only notebooks meeting the required standards reach the customer. Every notebook is inspected for defects including crooked ruling, uneven binding, dirty or damaged covers, incorrect page count, poor trimming, and any other visual or functional defects. Notebooks are graded as first quality, second quality (minor defects), or rejected (major defects).
First quality notebooks are packaged for regular sale while second quality notebooks may be sold at reduced prices or to discount retailers. Rejected notebooks are recycled or disposed of to prevent them from entering the market and damaging the brand reputation. Implementing a robust quality control system at this stage protects your brand value and ensures customer satisfaction, which is essential for building long-term business relationships with schools, retailers, and distributors.
Step 10 - Packaging and Dispatch
The final step in the notebook manufacturing process is packaging the finished notebooks for storage and distribution. Standard packaging involves wrapping bundles of notebooks (typically 10-25 notebooks per bundle) in polyethylene or paper wrapping, then packing these bundles into corrugated cardboard boxes for transportation. Each package is clearly labeled with the product name, size, quantity, manufacturing date, and batch number for easy identification and inventory management.
Proper packaging protects notebooks from moisture, dust, and physical damage during storage and transportation. The packaging should be strong enough to withstand the rigors of distribution while being cost-effective and environmentally responsible. Many manufacturers are now switching to recyclable and biodegradable packaging materials to reduce their environmental footprint and appeal to environmentally conscious customers.
Frequently Asked Questions
What are the main steps in notebook manufacturing?
The main steps in notebook manufacturing include: (1) Paper selection and procurement, (2) Paper cutting to required sizes, (3) Line printing on inner pages, (4) Cover design and printing, (5) Page counting and collation, (6) Folding cover and pages, (7) Stitching or binding the spine, (8) Edge trimming for clean finish, (9) Quality inspection, and (10) Packaging and dispatch. Each step requires specific equipment and quality control measures to ensure the final product meets market standards.
What paper is used for making notebooks?
Notebooks are typically made using uncoated wood-free paper with GSM ranging from 55 to 75. The most common paper used in India for standard exercise notebooks is 55 GSM or 60 GSM uncoated paper. Premium notebooks use 70 GSM or 80 GSM paper for a smoother writing experience. Cover paper is usually 150 GSM to 250 GSM with optional lamination for durability and appearance.
How long does it take to manufacture a notebook?
Using a semi-automatic notebook making machine, a single notebook can be manufactured in approximately 30-60 seconds from paper feeding to finished product. However, the overall manufacturing cycle including paper cutting, printing, and quality inspection typically takes 2-4 hours per batch. Fully automatic machines can produce a finished notebook in under 15 seconds, enabling production of thousands of notebooks per day.
Product Price & Details
Notebook Making Machine
Price: ₹12,90,000* (Ex-works, GST extra)
SKU: BLOG-NB-003
Brand: Laghu Udyog India | Warranty: 1 Year
Related Products